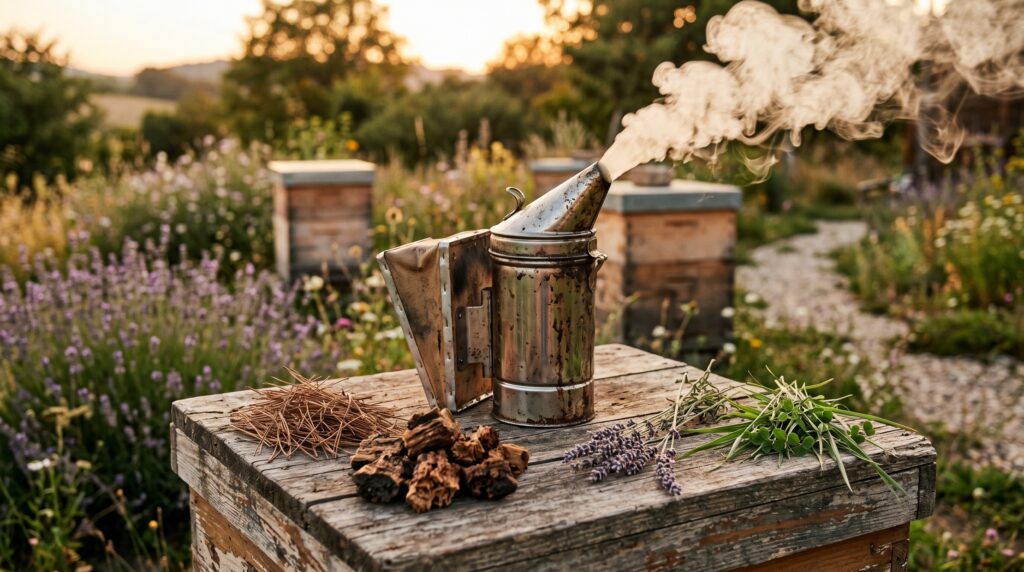
Picture this: You are halfway through a deep spring hive inspection. The frames are heavy with brood and honey, the sun is beating down, and the colony is starting to get defensive. Guard bees begin head-butting your veil, and the unmistakable, sweet, banana-like scent of the alarm pheromone (isopentyl acetate) fills the air. You instinctively reach for your smoker to gently calm the hive—only to squeeze the bellows and find it completely extinguished.
Panic sets in. You are now holding an open, agitated hive with no way to mask the alarm pheromones.
A smoker going out mid-inspection is a rite of passage for every new beekeeper, but it is a deeply frustrating one. The common instinct is to blame the tool itself, the weather, or the brand of commercial fuel pellets you bought. But if your smoker is constantly blowing hot, invisible air, spitting out dangerous sparks, or dying out entirely after ten minutes, the problem is not your equipment—it is your airflow strategy.
Welcome to the 4-Layer Oxygen Starvation Technique. This traditional apiculture method is the secret to building a smoker fire that burns thick, cool, and stark white for hours on end, keeping both you and your bees perfectly calm.
The Physics of a Smoldering Fire
To master the bee smoker, you must first unlearn how to build a campfire.
When you build a campfire in your backyard, your goal is to maximize oxygen flow. You stack the wood loosely so air can circulate, creating high, hot, roaring flames. If you do this in a bee smoker—by loosely dropping in a handful of dry leaves or store-bought wood chips and lighting it—the fuel will burn through in five minutes. Worse, the smoke exiting the nozzle will be thin, dark gray, and hot enough to physically singe the delicate wings of your bees.
A smoker is essentially a miniature kiln. Your goal is not to create an open fire, but a sustained smolder. To achieve a smolder, you must intentionally restrict the airflow—a process known as oxygen starvation. By packing the fuel incredibly tightly, you force the fire to crawl slowly through the dense material, emitting massive amounts of heavy, cool smoke rather than hot flames.
To achieve the perfect oxygen-starved smolder, you need to construct your smoker fire using four distinct, purposeful layers.
Layer 1: The Spark (Building the Engine)
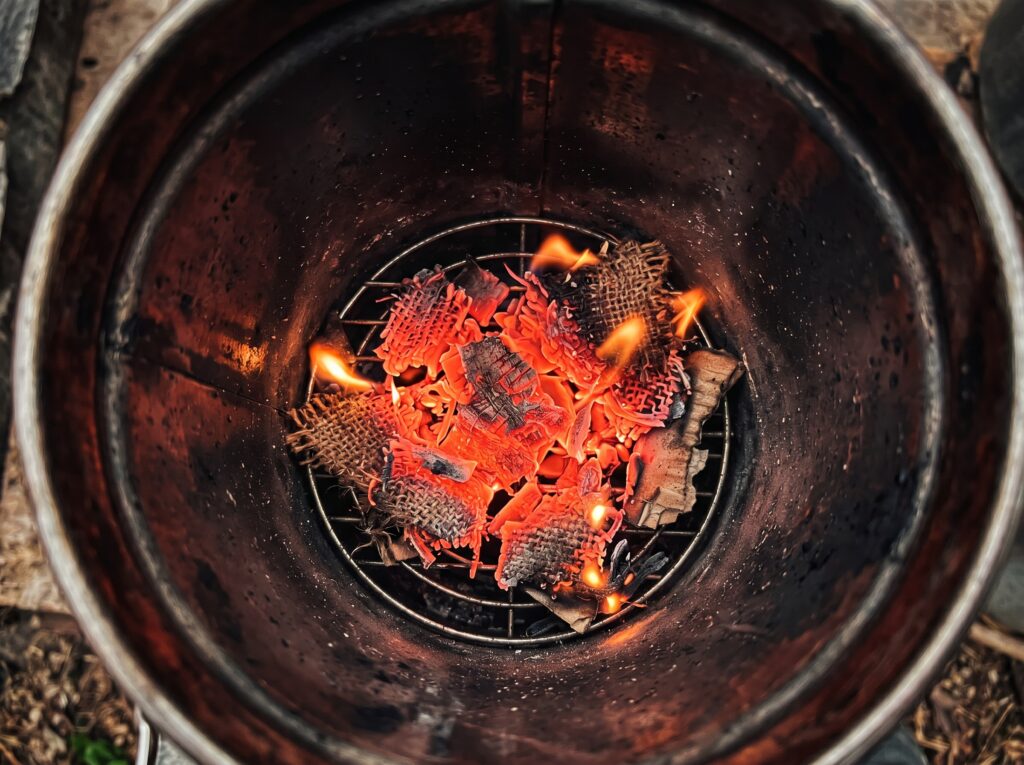
You cannot starve a fire until you have a roaring, established heat base to work with. The very bottom of your canister needs to be a furnace of red-hot coals.
- Take a handful of high-surface-area starter material. This can be a strip of untreated brown cardboard, a piece of natural jute burlap, or a loose handful of completely dry pine straw.
- Drop it into the bottom of the open canister and light it with a long lighter.
- Do not close the lid. Leave the lid completely open and pump the bellows vigorously. You want actual flames visibly shooting out of the top of the canister.
Keep pumping until your starter material has collapsed into a glowing red bed of embers at the bottom grate. This hot ember bed is the engine of your smoker. Do not proceed to the next step until this solid heat base is established, or your fire will suffocate later!
Layer 2: The Core (The Bulk Fuel & The “Squeeze”)
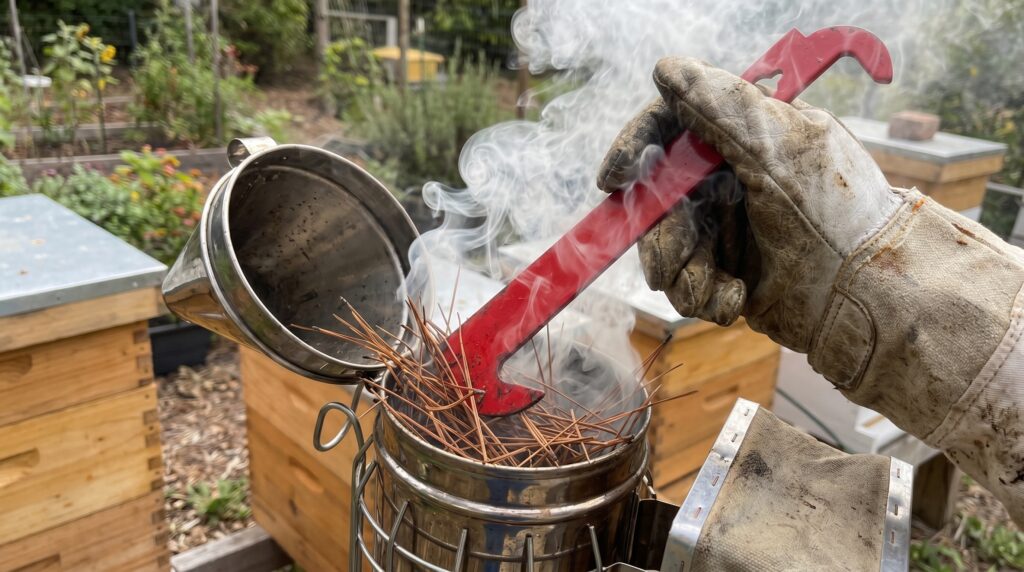
Once your coals are glowing cherry red, it is time to add your primary bulk fuel. For traditional beekeepers, this is usually dried pine needles (pine straw) or foraged, decayed hardwood known as “punk wood.”
Begin dropping handfuls of your bulk fuel into the canister. Pump the bellows three to four times after every handful to ensure the new fuel catches the intense heat from the coals below.
Once the canister is three-quarters full, it is time to implement the Oxygen Starvation Technique.
Take the flat end of your metal J-hook hive tool and shove the fuel down into the canister as hard as you physically can. Compress it until it feels like a solid brick at the bottom. Add another large handful of fuel to the top, and compress it violently again.
By packing the fuel this tightly, you are purposefully cutting off the oxygen supply. The intense heat at the bottom desperately wants to ignite the pine needles, but without ambient oxygen, it cannot create a flame. It has no choice but to slowly smolder upward, producing incredibly thick, voluminous white smoke.
Layer 3: The Aromatics (The Apothecary Touch)
Traditional beekeeping is about working holistically with the bees and utilizing your local landscape. Instead of just blowing plain wood smoke into the hive, elevate your fuel by adding a medicinal, aromatic layer.
On top of your tightly compressed bulk fuel, toss in a small handful of dried botanicals. Dried lavender, rosemary sprigs, or dehydrated citrus peels (like orange or grapefruit) are phenomenal choices.
These natural elements possess a massive essential oil content. As the intense smolder reaches this layer, the plant oils vaporize, creating a rich, sweet, incense-like aroma. Not only does this smell wonderful for the beekeeper, but these specific botanical oils are incredibly effective at masking guard bees’ alarm pheromones, soothing the colony, and making your hive inspection drastically more peaceful.
Layer 4: The Filter (The Green Grass Trick)
This is the old-timer trick that 90% of beginner beekeepers skip, and it is arguably the most important layer for the safety of your bees and your apiary property.
Right before you close the lid of your smoker, reach down and grab a large handful of fresh, green grass or broadleaf weeds from the ground next to your hives. Roll the green grass into a loose ball and stuff it directly into the top of the canister, right under the conical lid.
This green grass plug acts as a biological filter and serves two vital purposes:
- The Spark Arrestor: It catches any glowing embers or hot ash traveling up the canister, preventing them from shooting out of the nozzle. This protects your bees’ wings from getting burned and prevents you from accidentally starting a brush fire in dry summer grass.
- The Heat Sink: The natural moisture inside the green grass acts as a swamp cooler. It instantly drops the temperature of the hot smoke as it passes through the wet blades.

The Final Check: The “Wrist Test”
Once your smoker is fully packed and the lid is snapped securely over the green grass, give the bellows a few long, slow pumps. The smoke billowing out should be thick, opaque, and milky white. It should never be thin, blue, or dark gray.
Before pointing the nozzle at your open hive, always perform the Wrist Test. Pump a blast of smoke directly onto the bare, sensitive skin of your inner wrist from about three inches away. The smoke should feel completely cool, or at most, slightly warm.
If it feels hot, or if you feel sharp sparks hitting your skin, your fire has too much oxygen! Open the lid, use your hive tool to pack the fuel down even tighter, add a thicker layer of wet green grass to the top, and try again.
By moving away from commercial wood pellets and mastering this traditional 4-layer technique, you will step into your apiary with total confidence. A properly starved smoker can easily sit on the edge of a hive lid and gently chug along for two to three hours, ensuring you always have cool, calming smoke exactly when you need it.
Looking to upgrade your apiary gear this season? Head over to the Honey Road Shop page to browse our curated selection of reliable stainless steel smokers, natural protective gear, and traditional beekeeping tools.
More from the Honey Road Journal
If you found this guide helpful, check out some of our other recent deep-dives into the fascinating (and sometimes brutal) world of bees and apiary gardens:
- Is Your Garden Truly Safe? 7 Common Toxic Plants to Avoid (And What to Plant Instead!) – A must-read if you are currently planning your yard layout!
- The Hive’s Grim Reapers: Meet the “Undertaker” Bees
- Nature’s Biological Oven: How Honeybees Roast “Murder Hornets” Alive