Bringing a colony of honey bees into your garden is one of the most rewarding and environmentally impactful journeys you can embark upon. However, establishing a thriving backyard bee yard requires much more than simply placing a wooden box in an empty patch of grass. A meticulously planned apiary layout directly influences the health of your colony, their honey production, and your overall experience and safety as a beekeeper.
An optimally designed bee yard creates a protective microclimate. It defends your bees against harsh weather, deters opportunistic predators, and establishes a streamlined, ergonomic workflow for you. Whether you are bringing home your very first package of bees after reading up on comprehensive beginner beekeeping guides, or you are a seasoned apiarist looking to reorganize your space, mastering the foundational rules of apiary design is absolutely critical.
In this comprehensive guide, we will dive deep into the 10 absolute essentials of garden apiary layout and design so you can set your essential pollinators up for long-term success.
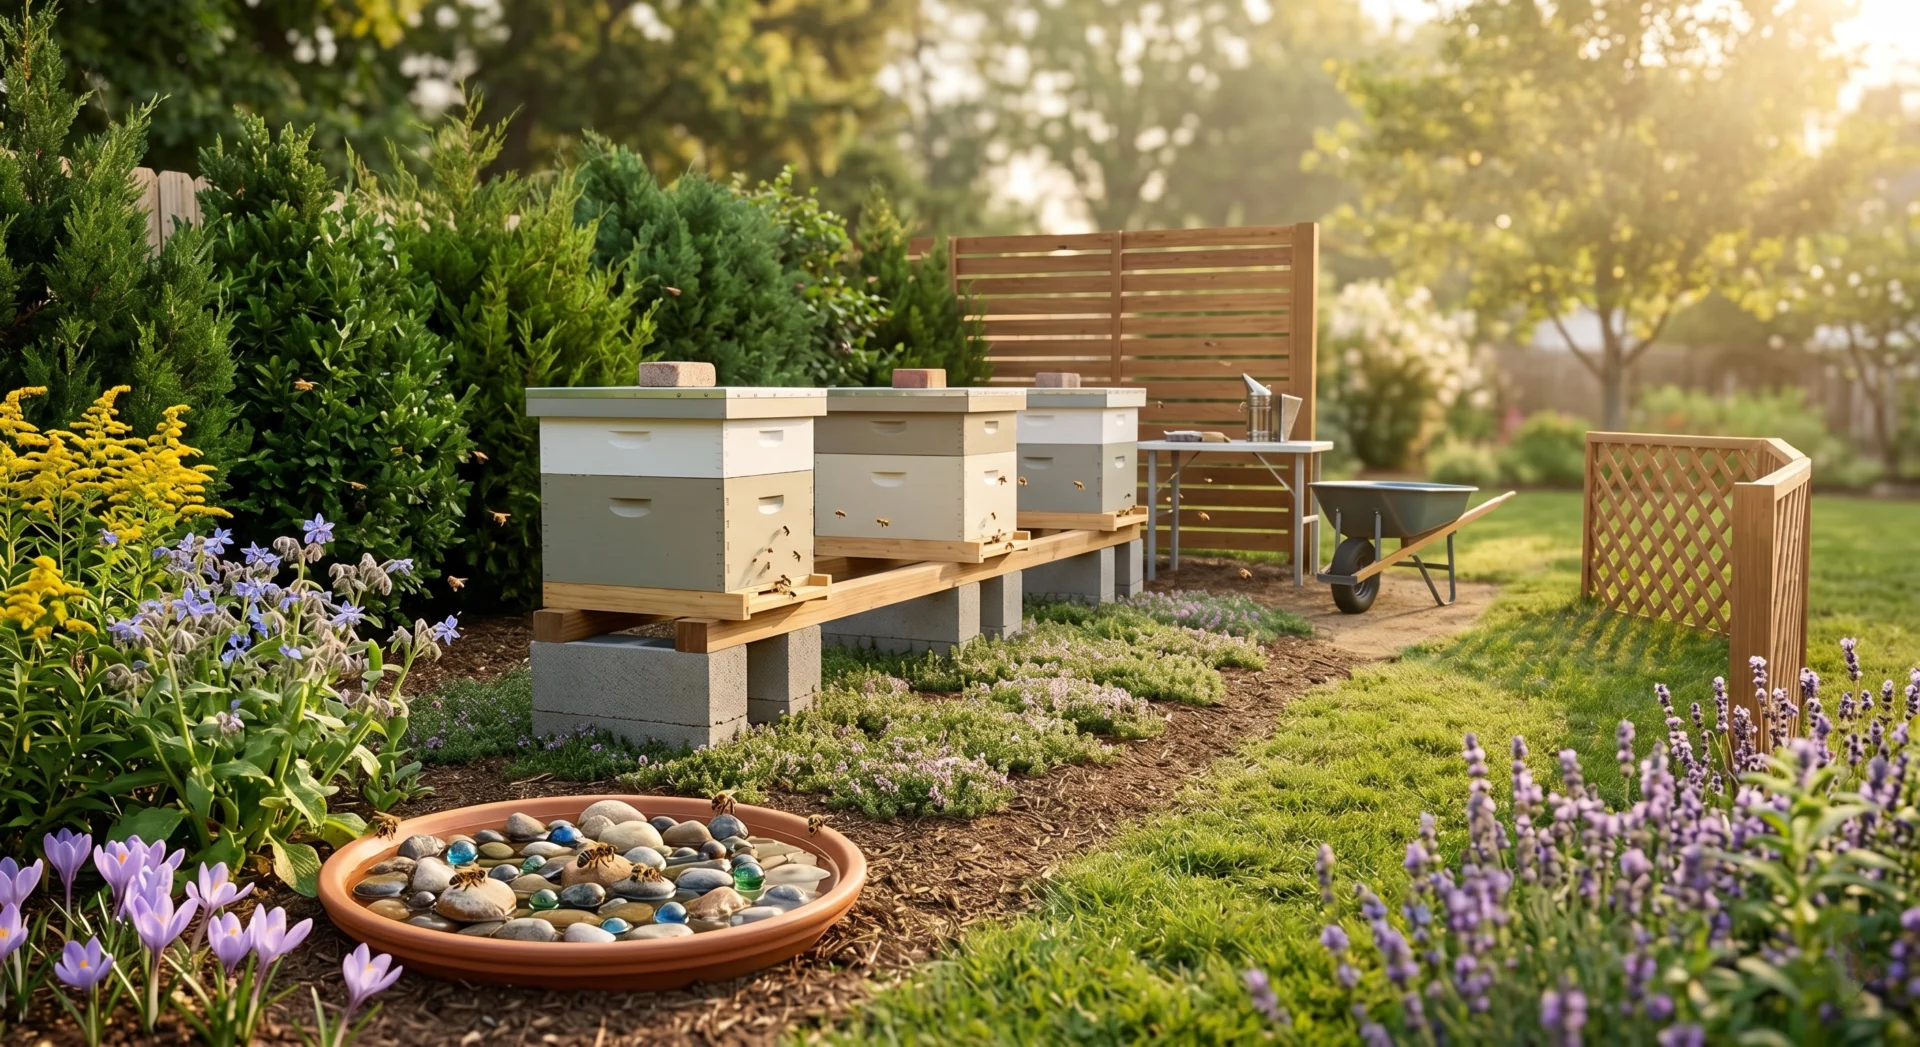
Table of Contents
1. Maximize Morning Sun Exposure
When positioning your hives, the geographical orientation of the entrance is one of the most critical factors to consider. As a general rule, you should always try to face your hive entrances to the South or Southeast.
- The Early Bird Forages First: Honey bees are solar-powered and highly sensitive to temperature. The morning sun warms the front of the hive, acting as a natural alarm clock that signals to the foragers that it is time to wake up and start flying.
- Moisture and Pest Control: Morning sunlight quickly burns off overnight dew and reduces internal moisture. Dampness inside a hive is a bee’s worst enemy and can lead to devastating fungal diseases like chalkbrood. Additionally, sunlight deters the Small Hive Beetle, a destructive pest that prefers dark, shady areas.
2. Establish a Sturdy Windbreak
While gentle summer breezes are beneficial for hive ventilation, harsh winter winds can absolutely devastate an overwintering colony. A strong, biting wind strips the hive of its internal heat, forcing the winter cluster to vibrate their flight muscles harder and burn through their honey stores too rapidly just to stay warm.
To prevent this, position your hives in front of a natural or artificial windbreak. According to agricultural guidelines from the Penn State Extension, planting a dense row of evergreen shrubs or installing a slatted wooden fence behind your hives can drastically reduce wind chill and winter mortality rates. Just ensure the windbreak is positioned at the back and sides of the hives, leaving the front entrance completely unobstructed.
3. Elevate Your Hive Stands
One of the most frequent errors among new beekeepers is placing a bottom board directly on the damp ground. For optimal hive health, hives must be elevated at least 12 to 18 inches off the soil.
- Pest Prevention: Skunks and opossums are notorious apiary pests. They will approach a low-sitting hive at night, scratch on the entrance, and eat the guard bees that come out to investigate. Elevating the hive forces these animals to expose their vulnerable underbellies to stings, naturally deterring them.
- Rot and Dampness: Keeping your woodenware off the wet soil prevents the wood from rotting prematurely, saving you money and extending the life of your equipment.
4. Clear the “Flight Runway”
Honey bees do not fly straight up like a helicopter. When they leave the hive, they shoot out and gradually ascend at a 45-degree angle. This flight path—often referred to as the “runway”—extends for about 10 to 15 feet in front of the hive.
Never face your hive entrances toward a busy sidewalk, a children’s play area, or a high-traffic garden path. If humans or pets frequently cross the runway, returning guard bees may view them as a threat, resulting in defensive behavior and unwanted stings. If you are in a tight urban space, you can place a 6-foot tall lattice fence about 5 feet in front of the hive. This harmlessly forces the bees’ flight path upward and over human heads safely.
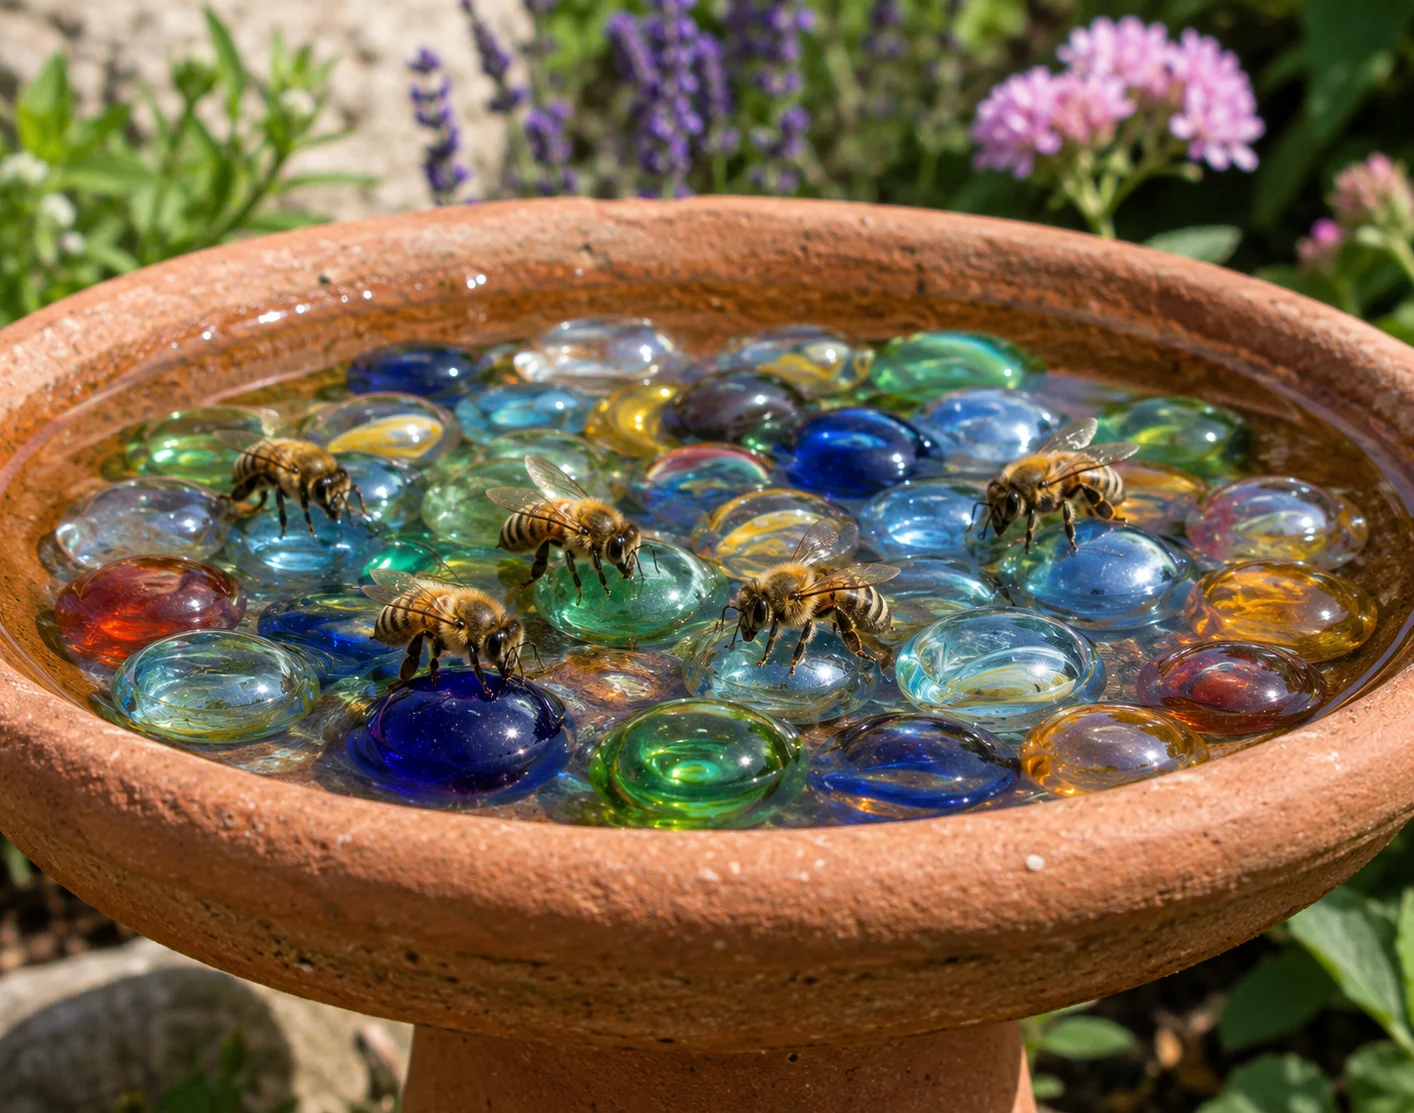
5. Provide a Dedicated, Safe Water Source
It is a common misconception that bees only need nectar. In reality, a single colony can consume up to a liter of water a day during the sweltering heat of summer! They use it to dilute thick honey for feeding and to evaporatively cool the hive. If you do not provide a water source, your bees will inevitably find their way to your neighbor’s swimming pool or birdbath.
How to Build a Safe Bee Bath
- Choose a shallow container, such as a terracotta saucer or a standard birdbath.
- Fill it with large river rocks, glass marbles, or floating corks. Honey bees cannot swim, and they will easily drown if they do not have dry landing platforms.
- Place the water source within 20 to 30 feet of the apiary so they do not have to expend valuable energy flying long distances.
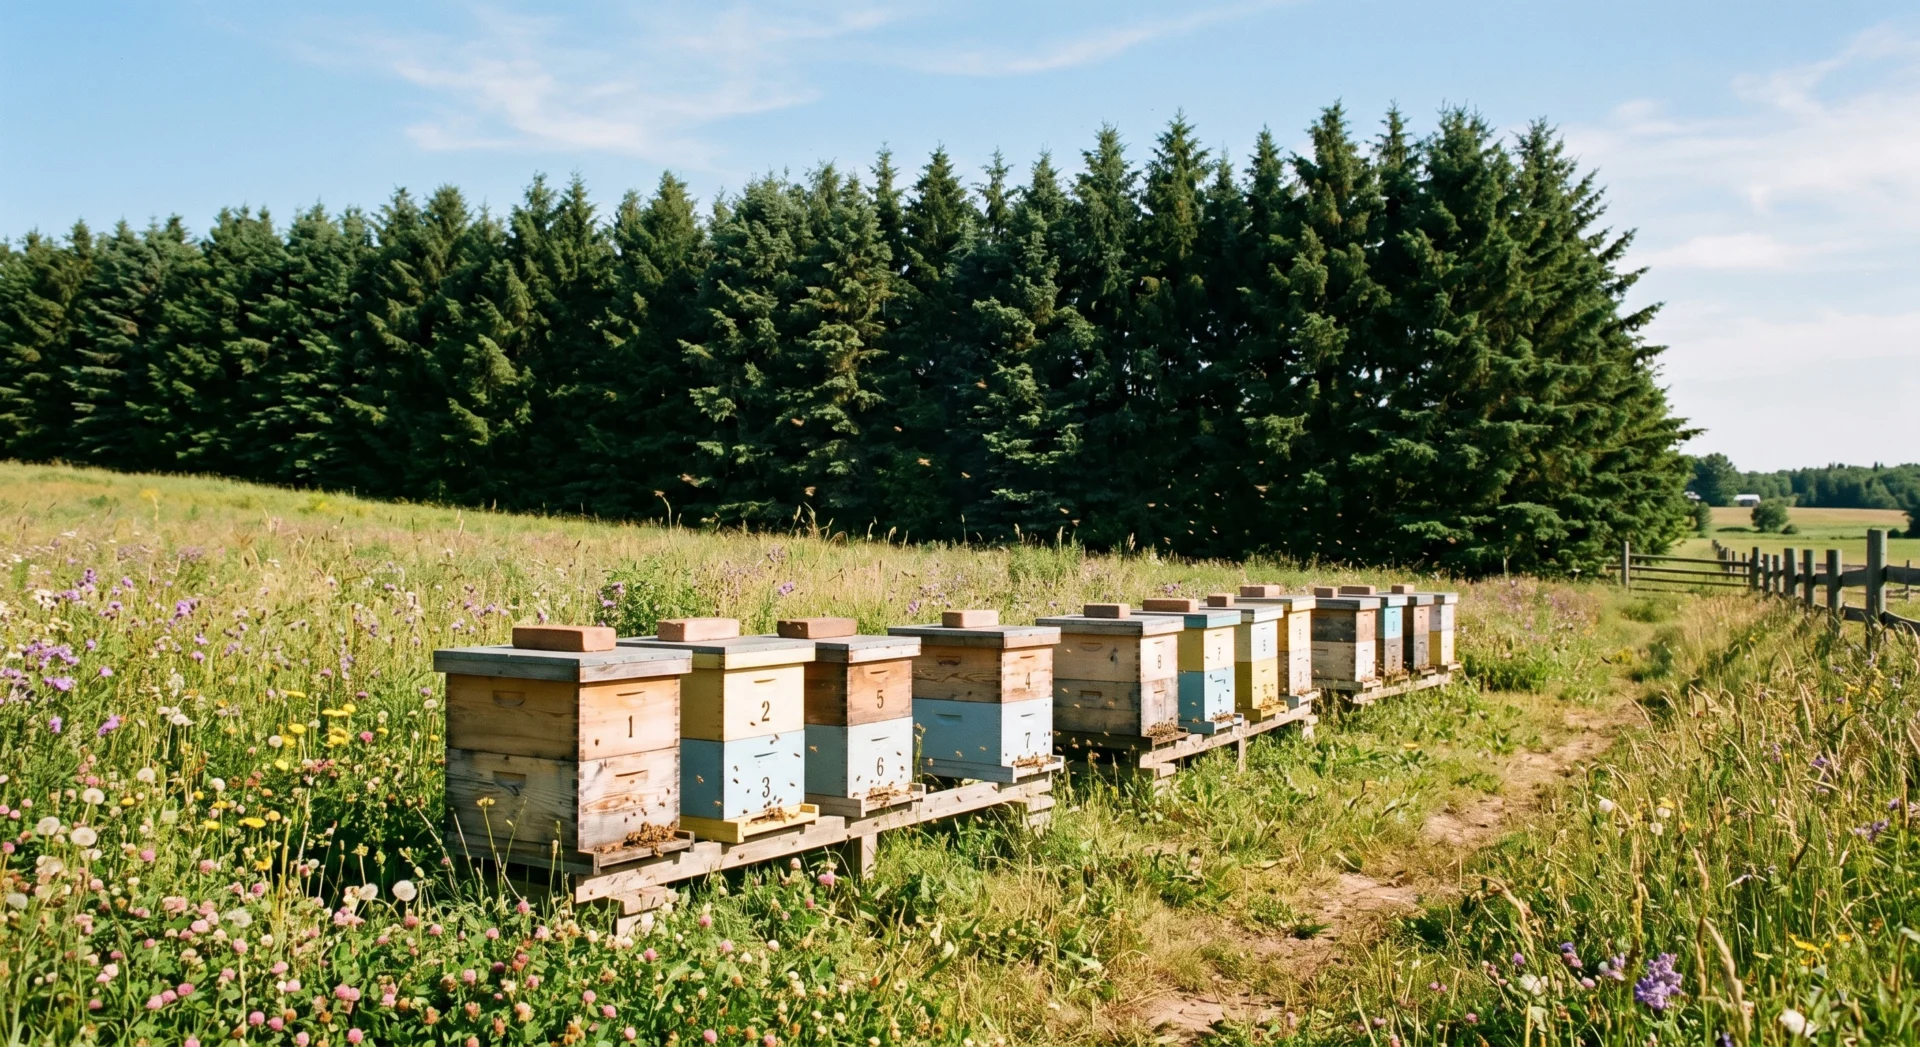
6. Perfect the Spacing Between Hives
If you are setting up multiple colonies, do not cram them tightly together on a single, cramped bench.
First, closely spaced, visually identical hives suffer from “drifting.” This occurs when returning foragers accidentally enter the wrong hive. Drifting can quickly spread diseases and Varroa mites from a weak colony to a strong, healthy one. Second, you need physical space to stand beside or behind the hive during inspections. A minimum of 2 to 3 feet between each hive allows you to comfortably remove frames and stack heavy boxes without bumping into the neighboring colony.
7. Level the Ground with a Slight Tilt
Honey bees build their wax comb based on the strict laws of gravity. They act as natural plumb lines. If your hive stand is leaning heavily to the left or right, the bees will build their comb off-center, connecting multiple wooden frames together in a messy, unmanageable structure known as “cross comb.”
Use a bubble level when setting up your cinder blocks or wooden stands. The hive should be perfectly level from side to side. However, it should have a very slight, almost imperceptible forward tilt (about a quarter of an inch) so that rainwater and internal winter condensation naturally roll out the front entrance instead of pooling on the bottom board and causing mold.
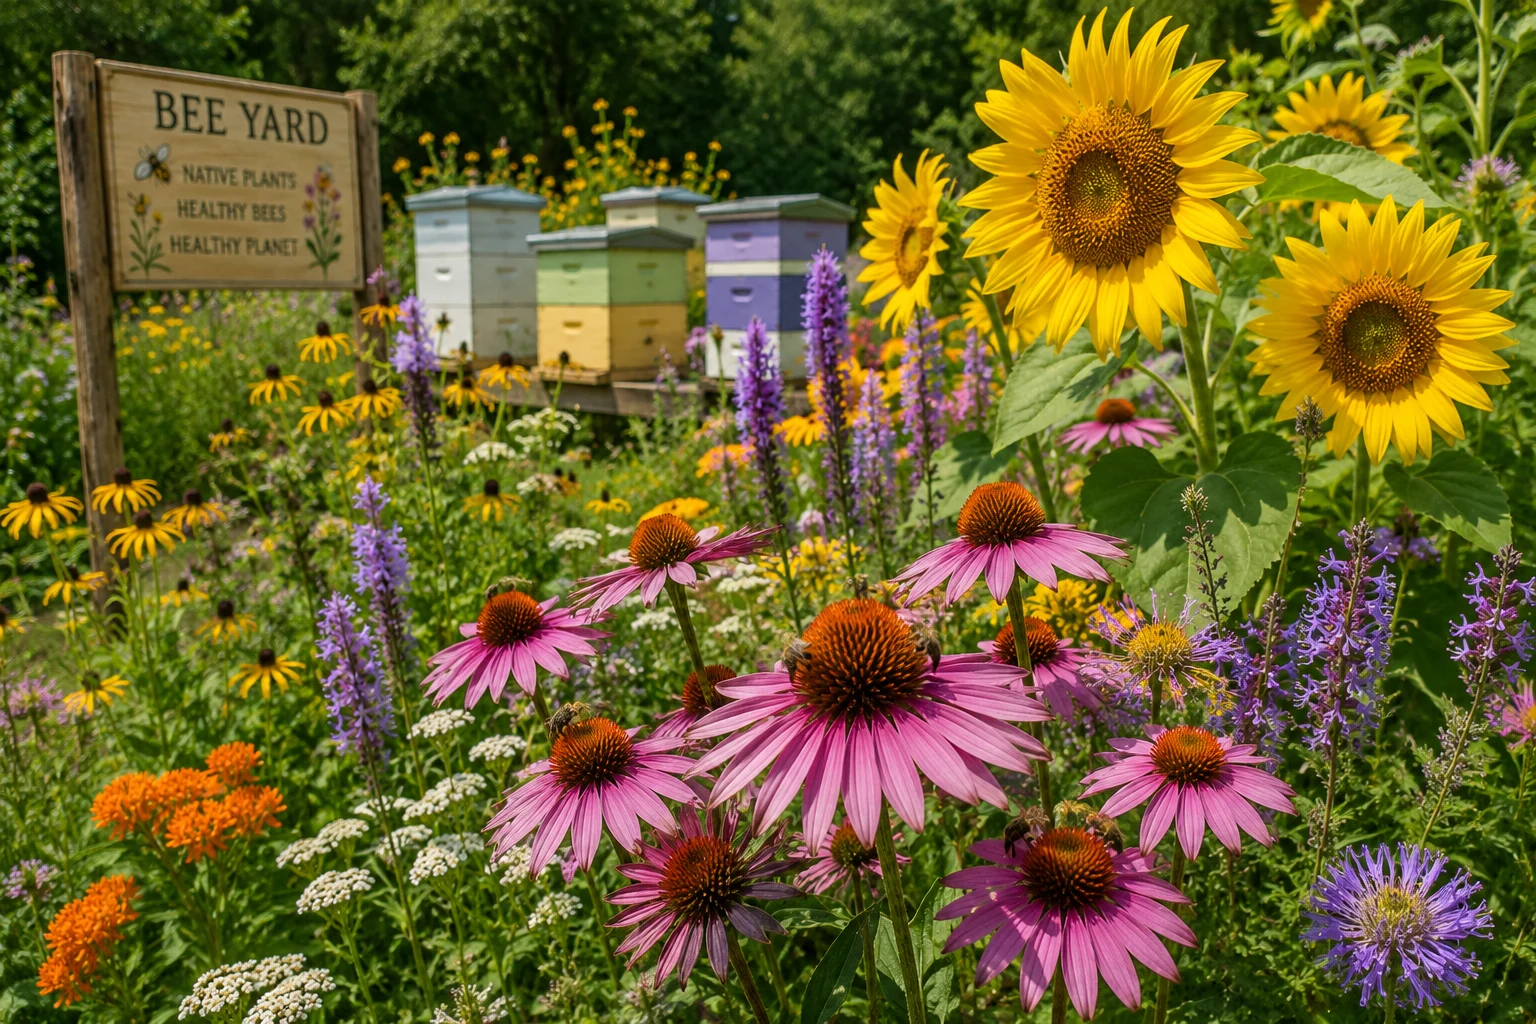
8. Plant Proximity Forage and Ground Cover
A truly optimized garden apiary extends beyond the immediate footprint of the hives; it includes the surrounding landscape. While bees will fly up to 3 miles to forage, having close-proximity nectar and pollen sources is incredible for colony morale, especially during early spring and late fall shortages.
The Xerces Society for Invertebrate Conservation strongly recommends planting native, staggered-blooming perennials. Focus on integrating early-blooming crocuses, mid-summer borage, and late-fall goldenrod to create a robust, resilient environment. Furthermore, ditch the grass directly under the hives and plant a low-maintenance ground cover like creeping thyme. This is a brilliant way to cultivate a natural apiary ecosystem and hive management, as thyme naturally suppresses weeds and releases mite-deterring essential oils when crushed.
9. Plan for Pest and Predator Deterrence
Depending on your geographical location, you will need to design your apiary with local wildlife in mind. Your bees work tirelessly to build up reserves of honey, pollen, and brood, making the hive a highly attractive target.
Common Apiary Predators
- Mice: In the autumn, mice love to squeeze into warm hives to nest, destroying wax comb in the process. Ensure your layout accommodates the addition of metal mouse guards at the hive entrances before the first frost.
- Bears: If you live in bear country, a standard wooden fence will not cut it. You must design your layout to include the installation of a heavy-duty, solar-powered electric fence. Build the fence before the bees arrive, as a bear will always return if they successfully taste your honey once.
10. Optimize Beekeeper Accessibility
Finally, the perfect garden apiary must be designed for you, the beekeeper. Beekeeping is incredibly heavy, physical work. A deep Langstroth box full of winter honey can easily weigh upwards of 70 to 80 pounds.
When laying out your apiary, ask yourself:
- Can I get a wheelbarrow or a garden cart right up to the back of the hives?
- Is the pathway clear of tripping hazards like roots, large rocks, or uneven terrain?
- Do I have enough room to set down my smoker and deep supers without losing them in tall grass?
Always prioritize ergonomic, flat pathways that will save your back during the busy, heavy honey harvest season. A layout that makes your workflow easier will ensure you conduct thorough, regular inspections safely.
Conclusion
Designing the perfect garden apiary is an exercise in balancing the biological needs of the honey bee with the practical needs of the beekeeper. By taking the time to optimize your hive’s sunlight exposure, establishing sturdy windbreaks, respecting flight paths, and ensuring proper spacing and elevation, you are actively investing in the longevity and vitality of your colonies. A well-planned apiary minimizes stress on the bees, deters pests naturally, and turns your routine hive inspections into a joyful, seamless experience rather than a difficult chore. With a little forethought and strategic landscaping, your backyard can quickly become a thriving sanctuary for essential pollinators.