Walk into any commercial apiary, and you will likely smell a distinct, harsh odor clinging to the air—a mix of synthetic twine, processed wood pellets, and chemical fire starters. It gets the job done, but it is a far cry from the roots of the craft. Traditional beekeeping has always been intimately tied to the local landscape, relying on foraged, natural materials to work with the bees rather than against them.
The beekeeper’s smoker is arguably the most important tool in the apiary. Its purpose is not to choke or frighten the colony, but to gently mask the alarm pheromones (specifically isopentyl acetate) that guard bees release when the hive is opened. When executed correctly, smoke mimics the distant threat of a forest fire, prompting the bees to gorge on honey and remain calm. However, producing the right kind of smoke—thick, white, and completely cool to the touch—is a skill that takes patience, practice, and the right organic fuel.
If your smoker is constantly blowing hot ash, burning the wings of your bees, or going out right in the middle of a delicate hive inspection, the problem isn’t your bellows; it is your fuel strategy. Here is a deep dive into traditional, natural smoker fuels and the time-tested methods for building a fire that lasts.
The Anatomy of a Perfect Smoker Fire
A common mistake among new beekeepers is stuffing a handful of dry leaves into the canister, holding a lighter to the top, and hoping for the best. A smoker is essentially a miniature furnace, and it requires a carefully layered approach. You need three distinct components to keep it running for hours: the starter (to catch the flame), the kindling (to build a bed of hot coals), and the bulk fuel (to restrict oxygen and create the smolder).
1. The Starter: Catching the Spark
You need materials with a high surface area and a very low ignition point to get the fire breathing.
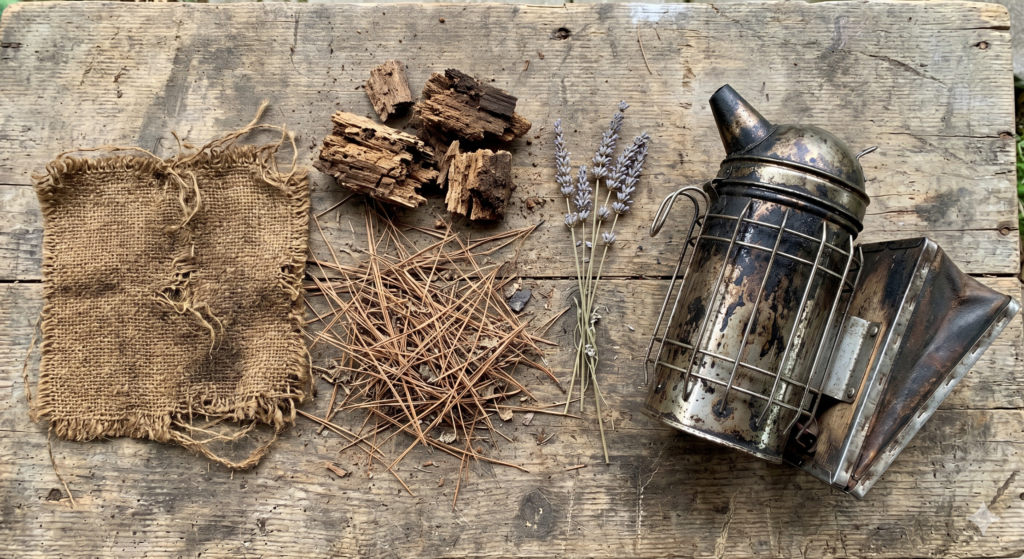
- Untreated Burlap or Hessian: For generations, beekeepers have recycled old natural-fiber coffee sacks. Burlap catches fire instantly and burns hot enough to establish your base. You must ensure it is 100% natural jute or sisal; modern burlap is occasionally interwoven with plastic polypropylene threads which will melt, releasing toxic fumes into your hive.
- Eucalyptus Leaves: If you live in a region where eucalyptus grows, these highly flammable, oil-rich leaves are incredible for starting a fire. They catch quickly and release a strong, medicinal scent that clears the air.
- Uncoated Cardboard: Tightly rolled strips of plain, brown, non-glossy cardboard are fantastic for establishing an initial flame at the very bottom of the canister.
2. The Bulk Fuel: The Sustained Smolder
Once you have a roaring little fire at the bottom of the canister, it is time to add the primary fuel. This material must be dense enough to burn slowly, yet porous enough to release billowing clouds of smoke without catching fire itself.
- Pine Needles (Pine Straw): The absolute gold standard for backyard apiaries. Dried pine needles are usually abundant, free to forage, and pliable enough to pack tightly into the smoker chamber. Because of their natural resin content, they produce a wonderfully thick, cool, and white smoke. To make them even easier to pack, gather needles that have been slightly weathered or run over by a lawnmower to soften them.
- Punk Wood: Ask any old-timer what the best smoker fuel is, and they will likely point to a rotting tree stump. Punk wood is soft, decayed, spongy wood (usually from hardwoods like oak, hickory, or cherry) found on the forest floor. It is completely useless for building a campfire because it doesn’t flame, which makes it perfect for a smoker. A few chunks of dry punk wood will smolder for hours on end, emitting a sweet, cool smoke.
- Sumac Bobs: The dark red, cone-shaped berry clusters of the staghorn sumac plant have been used by traditional beekeepers for decades. They burn incredibly slowly and are widely reputed to have an exceptionally calming effect on the colony.
3. The Aromatics: Elevating the Smoke
While not strictly necessary for keeping the smoker lit, adding organic aromatics to your fuel mix is a practice rooted in deep apiary ecology. Incorporating dried herbs transforms the harsh smell of burning wood into a pleasant, incense-like aroma, making the inspection much more enjoyable for the beekeeper while offering potential health benefits for the hive.
- Dried Lavender and Rosemary: These woody herbs have a massive oil content. When dried over the winter and tossed onto the hot coals of a smoker, they produce a rich, fragrant smoke that is incredibly soothing.
- Dried Citrus Peels: Stringing up orange or grapefruit peels to dry until they snap like a cracker provides an excellent, oily addition to your fuel packet.
- Medicinal Smokes for Mite Control: Traditional wild honey harvesters have long utilized local botanicals to maintain hive health. Preliminary USDA research has even shown that the smoke from burning specific organic materials, such as dried grapefruit leaves and the woody perennial creosote bush, can actually agitate Varroa mites, causing a high percentage of them to drop off the host bees. While not a standalone treatment, weaving medicinal herbs into your fuel mix is a brilliant nod to holistic hive management.
The Packing Technique: Starving the Fire
The most critical step in smoker management happens right after the fire is lit.
- Leave the lid open and drop your starter material to the bottom. Light it and gently pump the bellows until flames are visibly shooting out of the canister. You want a robust, hot fire at this stage.
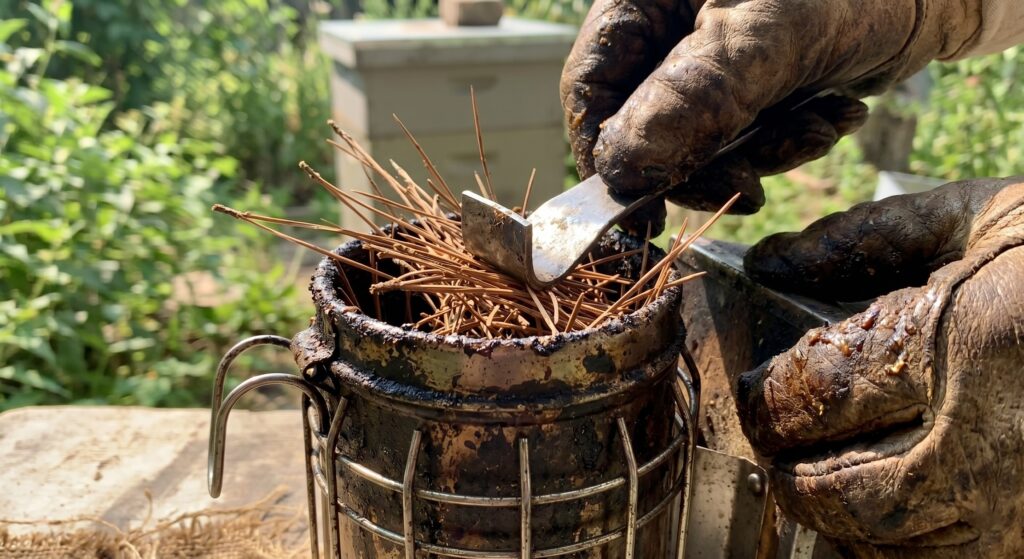
- Once a glowing bed of red coals is established at the bottom, begin adding your bulk fuel (like pine needles or punk wood) a handful at a time. Keep pumping the bellows with each addition to ensure the fire doesn’t suffocate.
- When the canister is about three-quarters full, use your hive tool to pack the fuel down as tightly as you physically can. This is the secret to a long-lasting smoker: by compressing the fuel, you starve the fire of oxygen, forcing it to smolder rather than burn.
- Top it off with a handful of fresh, green grass. This acts as a final filter, cooling the smoke before it exits the nozzle and preventing any stray sparks from shooting out onto your bees or the dry ground.
By stepping away from commercial, processed pellets and embracing the raw, foraged materials available in your local ecosystem, you tap into a much older, more rhythmic way of keeping bees.
Looking to upgrade your apiary gear this season? Head over to the Honey Road Shop page. We have curated an extensive, hand-picked catalog of our favorite traditional beekeeping tools, reliable stainless steel smokers, and protective gear from trusted third-party suppliers to help you assemble the perfect kit.
More from the Honey Road Journal
If you found this guide helpful, check out some of our other recent deep-dives into the fascinating (and sometimes brutal) world of bees and apiary gardens:
- Is Your Garden Truly Safe? 7 Common Toxic Plants to Avoid (And What to Plant Instead!) – A must-read if you are currently planning your yard layout!
- The Hive’s Grim Reapers: Meet the “Undertaker” Bees
- Nature’s Biological Oven: How Honeybees Roast “Murder Hornets” Alive